Open report on
When a new report is created it will always open on the Report options screen.
- Click the Vertical ellipsis > Preferences
- Select the preferred screen from Open report on
- For example, a setting of 'Notes' will make every report open at the Sections > Notes screen
- The setting is on a user basis
Sync editing default
When the trial balance screen is selected, the default Sync editing setting will always be On. The default Sync editing setting can be changed to the following options:
- On: Sync editing will be On each time the trial balance screen is opened in any report
- Off: Sync editing will be Off each time the trial balance screen is opened in any report
- Remember: The Sync editing setting that was last used for the report will apply each time the trial balance screen is opened in the report
To change the default Sync editing setting:
- Click the Vertical ellipsis > Preferences
- Select the Sync editing default setting, either On, Off or Remember
Toolbar layout
The default toolbar layout for the buttons in the report screens can be changed to the following options:
- Icons and text: Both the icon and the name of the icon will be displayed
- Icons only: Only the icons of the buttons will be displayed
- Text only: Only the names of the icons will be displayed
Icons in sections and notes
The default layout for the icons in sections and notes can be changed to the following options:
- Hide icons: All icons are hidden. On hover, only the Ellipsis menu displays. The Ellipsis menu will contain the other icons.
- Show icons on hover: All icons are hidden. On hover, all icons display.
- Always show icons: All icons display
Regardless of the default option selected, chart of account allocation codes will always display in the sections and notes.
Tutorial
- Click the Vertical ellipsis > Preferences
- Set Tutorial to On or Off
When the tutorial is turned on, a series of information and action points will appear at the top of the screen, guiding you through creating a report. Read each step and perform any 'ACTION' points within it. See the Training topic for more information.
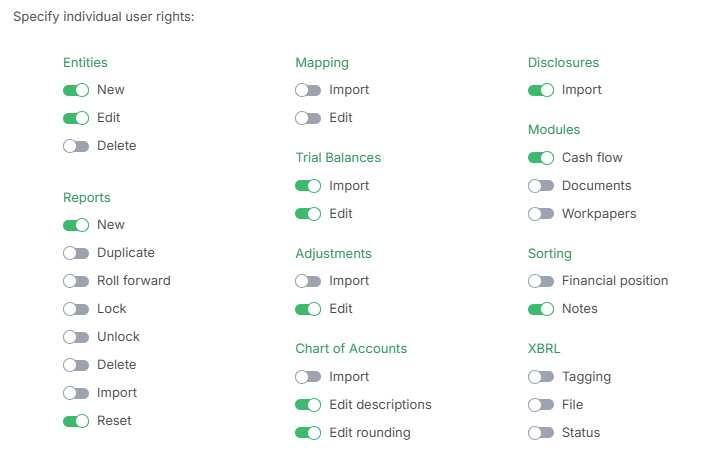
The following user rights are required as a minimum to complete the tutorial. If you are a user your Administrator or Manager can assign you the required user rights in User management.

Styles
Styles can be configured in Preferences for each user and then imported into any report.
This could be used when a style should be applied to all reports and a report template is not being used. This saves the user setting the styles manually for each report.
To import a user style:
- Set the style required in the Vertical ellipsis > Preferences
- Open a report
- Click Report options > Styles
- Select Customised in the Style group
- Click Import and follow the prompts
Styles can also be imported from reports into Preferences.
- Open a report with the required style
- Click the Vertical ellipsis > Preferences
- Click the Import button and follow the prompts
Reset styles
- Click the Vertical ellipsis > Preferences
- Click Reset styles and follow the prompts
Export
- Click the Vertical ellipsis > Preferences
- Click Export
A report must be loaded to be able to export styles, otherwise the button will be disabled.